Is hiring a professional designer not an option for you?
Are you looking for tools to help you create engaging visuals?
In this article, you’ll discover four tools to help you create and publish custom images and videos on Instagram and Snapchat.
4 Tools to Create Custom Instagram and Snapchat Visuals by Mitt Ray on Social Media Examiner.
#1: Design Engaging Images With PromoRepublic
On networks like Instagram and Snapchat, posting unique images usually drives the highest engagement. A tool that can help you create engaging images is PromoRepublic.
You get access to thousands of premium templates and an image editor for modifying them. The tool also offers a statistics section, which shows how well your posts are performing. PromoRepublic offers a 14-day free trial; after that, you’ll need to upgrade to a paid plan, which start at $9/month.
After you sign up, connect your Instagram account. You can also connect your Facebook, Twitter, and LinkedIn accounts.
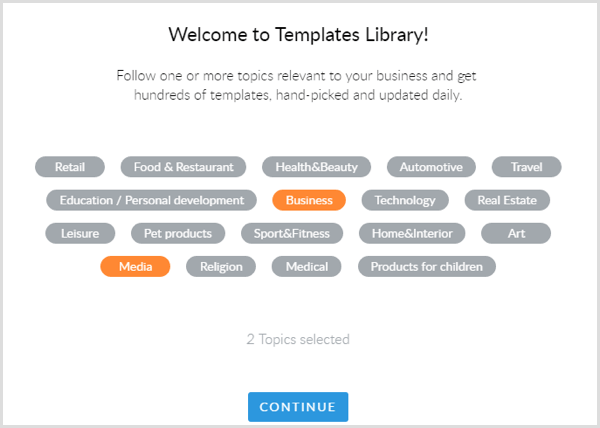
Then select your Instagram account in the left menu. When you do this, a pop-up appears where you can choose the topics you want to follow. This will make it easier to find templates later. You can also select subtopics to filter the templates further.
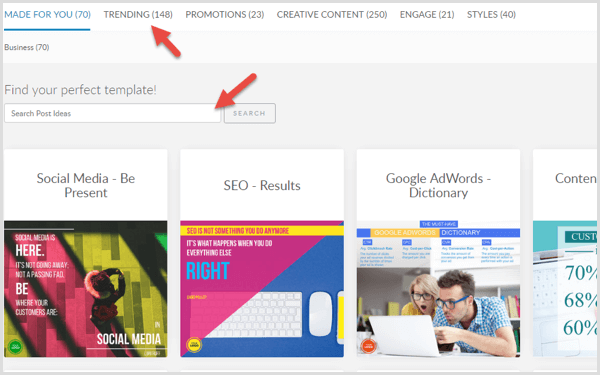
After you click Continue, you’ll see a collection of templates you can use. You can either select one in the Made For You section or explore the other sections until you find a template you like. There’s also a search field to narrow your results.
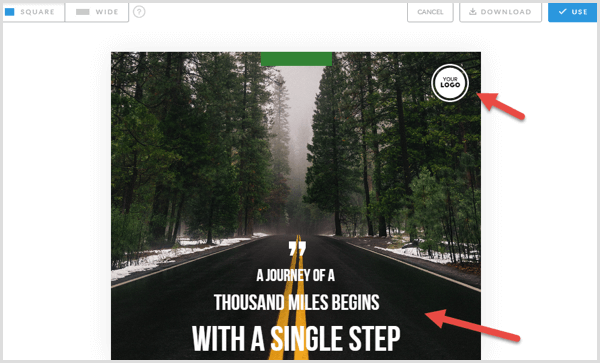
Once you find a template you like, select it, modify the text, and add your branding. You’ll see a logo placement suggestion in the template. If you don’t want to put your logo there or if you want to brand your image using another method, just delete the Your Logo placeholder.
Templates like the one below are great for creating Instagram image quotes, which drive a lot of engagement.
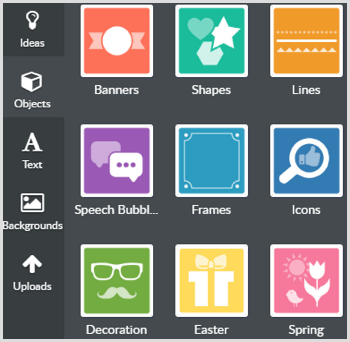
You can access additional background images and overlays like banners, icons, and frames. However, don’t overload your image with too much text and overlays because they reduce negative space.
PromoRepublic also lets you upload your own images.
When you’re satisfied with your creation, click Use in the top-right corner.
On the next page, add your description and hashtags to the post. Click Publish Now to schedule your image at a preferred time or add it to the queue.
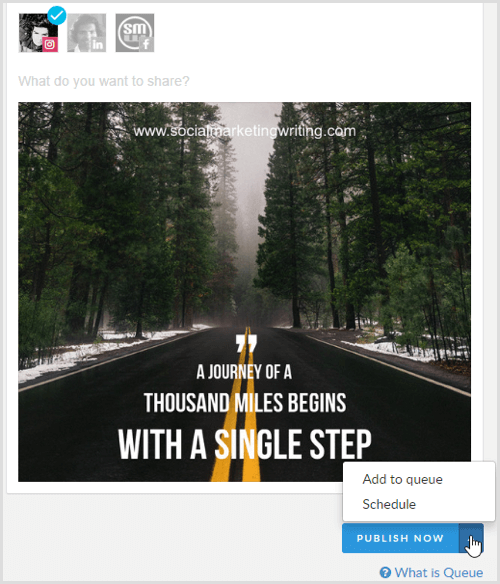
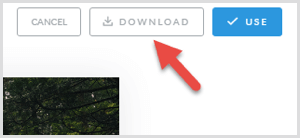
You can also download your image if you want to post it on Snapchat. Click Download in the top-right corner and save the image.
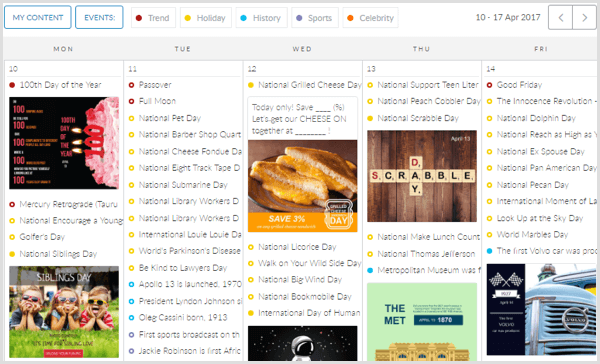
Open the content calendar to view your scheduled posts. You’ll also find image ideas/templates for upcoming events around which you can create visual content.
#2: Create Custom Emojis With Bitmoji
Bitmoji is a free tool that lets you create personal emojis to express happiness, sadness, and other feelings. You can use these emojis in your Snapchat chats or overlay them on your snaps. They’re a great way to get exposure for your personal brand on Snapchat, Instagram, and other social networks.
To get started, first install the Bitmoji app on your iOS or Android device; the screenshots here show the Android version but the iOS version works similarly. Next, sign up with email or log in with your Snapchat account.
To create your emoji avatar, choose whether you want it to be female or male. If you’re the face of your brand and your audience easily recognizes you, create an emoji that looks like you. But if you aren’t the face of the brand, create a character your target audience would enjoy interacting with. If your company has a mascot, create an emoji version of it.
![]()
Next, pick the avatar style: Bitmoji Style and Bitstrips Style. You can always change this setting later, so experiment to see which one looks and performs best.
![]()
You can choose a face shape, skin tone, hair color, eyebrows, and so on to customize your avatar. You can also dress it up in different clothing. Go through the entire customization process and design your character. Take your time and have fun with it.
![]()
When you finish customizing your design, your bitmojis will be ready and you can begin sharing them in various places including Snapchat and Instagram.
To share a bitmoji, select it and click the social network you want to share it on.
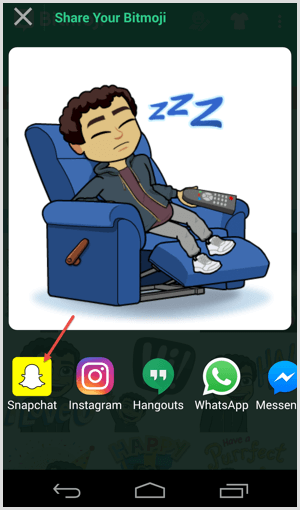
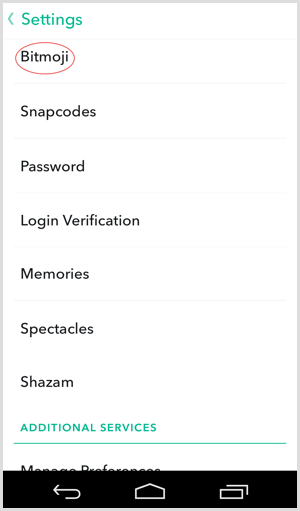
You can also integrate Snapchat with Bitmoji directly through your Snapchat settings. This integration makes it easy to share your bitmojis directly on Snapchat.
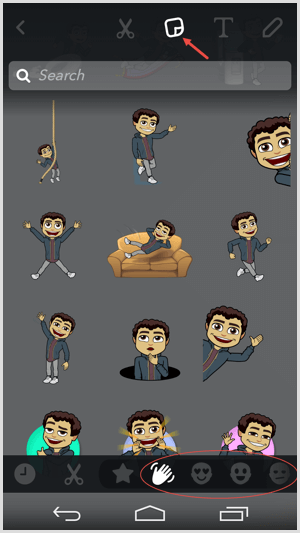
To add a bitmoji to a snap, click on the turning page icon that appears at the top of the screen when you take a snap. Browse through the bitmojis using the icons at the bottom of the screen and choose the most appropriate one to brand your snap.
#3: Construct Geofilters With Pepper Filters
Pepper Filters helps you create professional Snapchat geofilters quickly with ready-to-use templates and graphics. This tool can also help you submit your geofilter to Snapchat.
Create a Geofilter
When you visit the site, you can start creating your geofilter immediately; you don’t have to sign up.
On the left side of the screen, you’ll see a variety of templates to choose from. Browse through them and pick the template that best suits your campaign. The background image placed along with the template is just there for show. Only the overlay will show in your geofilter.
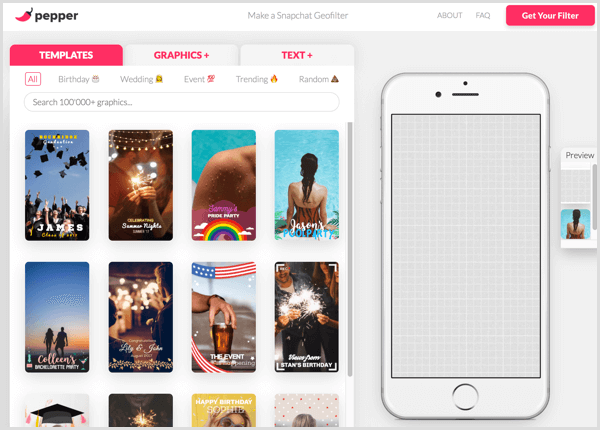
You can find additional templates under specific sections like birthdays and weddings, but you’ll have better luck looking under All to find geofilter templates to market your business.
When you select a template, it will appear in the mobile phone-shaped box on the right. This is a preview of how the template will appear on Snapchat.
To reposition text in the design, click and drag it. Double-click on it to edit the message, presets, typeface, font size, and many other things.
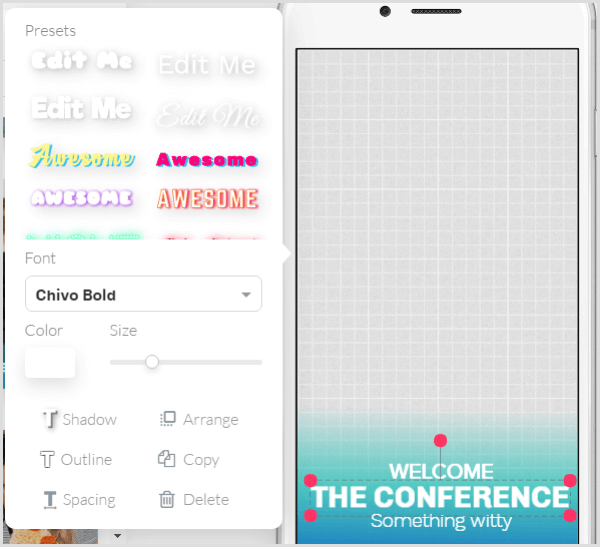
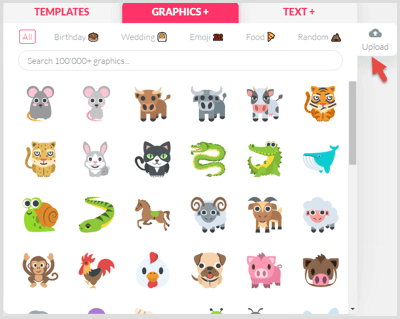
If your geofilter still needs something else, go to the Graphics tab and search for a graphic, and then click and drag to add it to your design. If you want to upload your own graphic, click the Upload button.
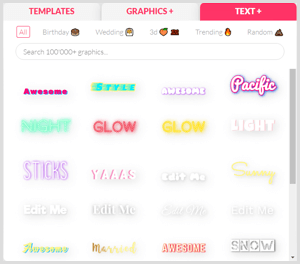
To add extra text, go to the Text tab and choose the preset style you want to use. Click and drag it into the editor and modify it just like you did the earlier text.

When you’re satisfied with the look of your geofilter, click the pink Get Your Filter button in the top-right corner.
Purchase Your Geofilter
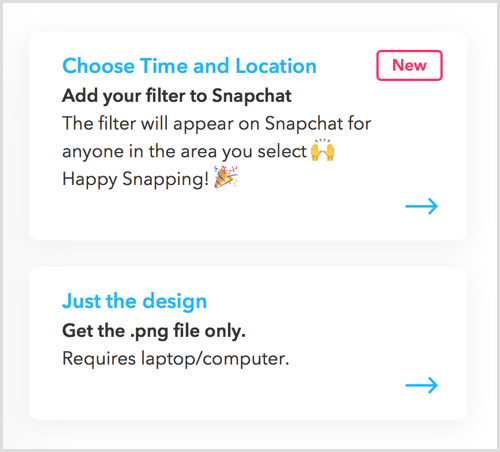
On the next page, you have two options for purchasing your filter. You can receive just the design of your filter for $9.99. Pepper Filter will send you the filter via email in the right format for Snapchat.
Or for an additional fee, you can choose a date, start time, and duration of 2, 6, 12, 24, or 48 hours for your filter. The design will then be $4.99, but the Snapchat fee will vary based on the length of time you select for your filter. Once you check out, Pepper Filter will submit it to Snapchat.
Upload the Geofilter
If you’re submitting the geofilter yourself, visit the On-Demand Geofilters page and click Create Now.
Next, click the Upload button and select the geofilter you just created. When you’re done, click Next.
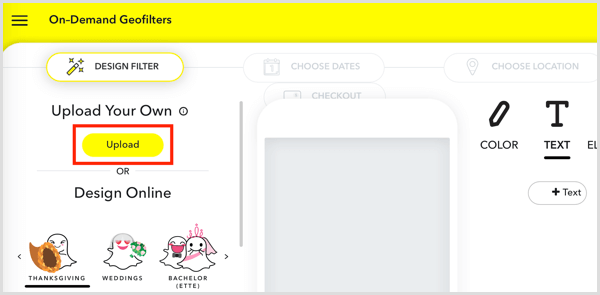
Now choose the dates when your geofilter will be active. After you make your selection, click Next.
The final step is to choose the area where you want your geofilter to be active. Click Draw Fence, and then click anywhere on the map and draw a polygon; this will be your area. When you’re finished, click Checkout.
On the next page, choose a filter type (Personal or Business), agree to the terms of service, and submit your payment. Your geofilter will then go through the review process. You’ll receive an email to let you know that it has been approved. Once it’s approved, you can use it if you’re in the area selected on the chosen dates. Download a screenshot of your snap for use on Instagram.
#4: Assemble Animated Videos With GoAnimate
GoAnimate makes it easy to create animated videos. Visit the tool’s website and sign up. There’s a 14-day free trial available, but to get full functionality, you need to purchase one of the paid plans.
After you sign up, click Make a Video. GoAnimate lets you create four types of videos from scratch and gives you the option to upload slides.
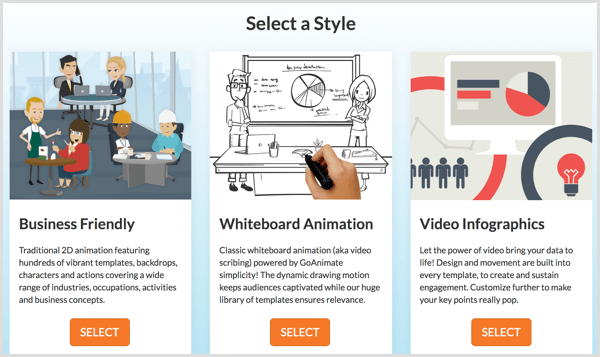
Choose Business Friendly to create a full animation with characters, backgrounds, settings, and so forth. If you select Whiteboard Animation, you get a marker to scribe and draw on a whiteboard. You can also create video infographics and simple animation with the Common Craft option.
For this example, we’ll choose the Business Friendly option. GoAnimate will then automatically pick a template for you. You can either use the default template or pick a different one.
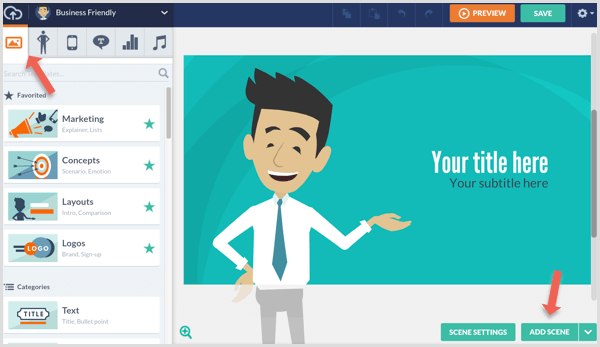
Browse the templates or search for them with relevant keywords. After you choose a template, start adding characters, props, text, vidgets, and music.
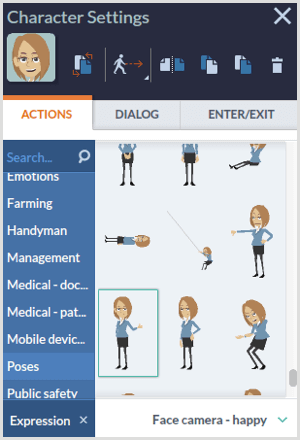
You can modify the elements that are already present in the template. To modify an element, just click on it. If it’s a character, for example, you can change what that character is doing and get it to speak.
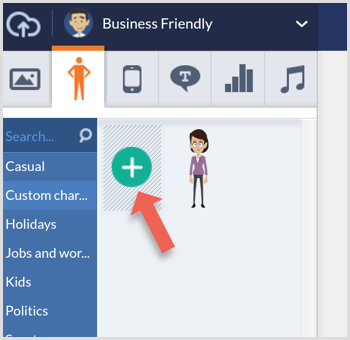
If you want to create a character from scratch, go to the Characters tab and select Custom Character. Then click the + icon to open the Character Creator. From here, you can design a character that looks similar to your bitmoji to help maintain a consistent brand.
If you want to add more scenes, click the green Add Scene button in the bottom-right corner.
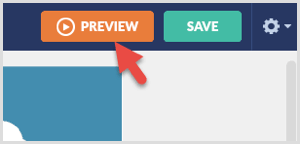
When you’re finished with your video, click Preview to view your animation. If you’re happy with it, click Save.
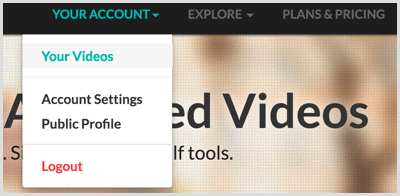
To download your video, go to the main page and click Your Account in the top menu. From the drop-down menu, select Your Videos.
A list of all of the videos you’ve created will come up. Click the title of the video you want to download.

On the selected video page, scroll down below the video to find various sharing options. Choose the first export option since you can’t directly share your video on Instagram or Snapchat.
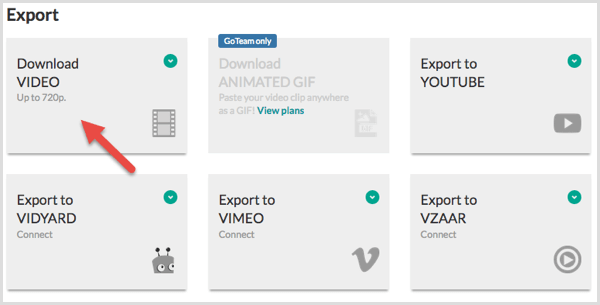
Using GoAnimate, you can create both educational and entertaining animations for sharing on social media.
How to Share Your Creations on Snapchat and Instagram
Some of the tools above don’t directly integrate with Snapchat and Instagram, so here are some quick tips for sharing your creations with your followers.
For Snapchat
To publish an image or video on Snapchat, first transfer the media you created on your desktop to your mobile phone. To do this, you can use any file hosting/cloud storage you prefer, such as Dropbox or Google Drive.
Open the software on your desktop and upload your video or image into your cloud storage.
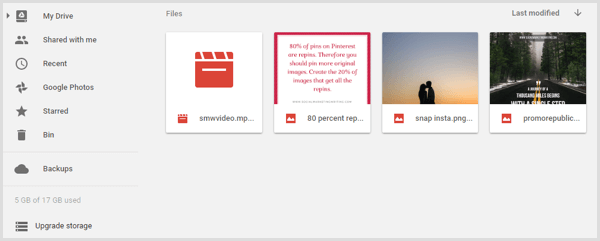
Now you should be able to access the file through the cloud storage app installed on your phone. Download the file you want to share to your smartphone.
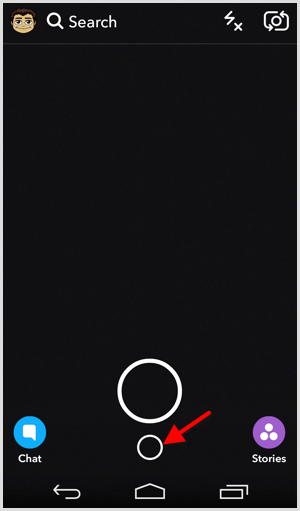
Next, open Snapchat and tap the small circle.
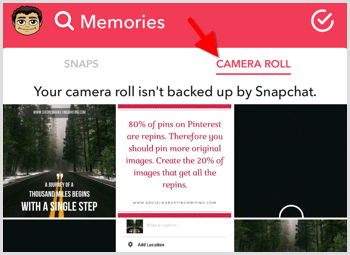
On the Memories page, tap the Camera Roll tab to see all of the recent media downloaded to your phone.
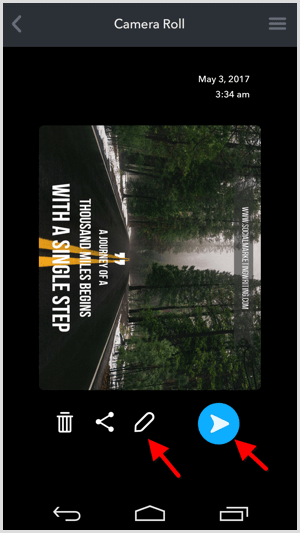
Tap the photo or video you want to share on Snapchat and then tap Edit & Send on the next screen. Make your edits and tap Send. Then choose the people you want to send it to and send it.
For Instagram
If you already have an Instagram management tool that lets you schedule posts from your desktop, you can use it to publish the videos and images you created with the above tools.
If you don’t have an Instagram management tool, transfer your media to your cloud storageand then to your mobile phone as described above.
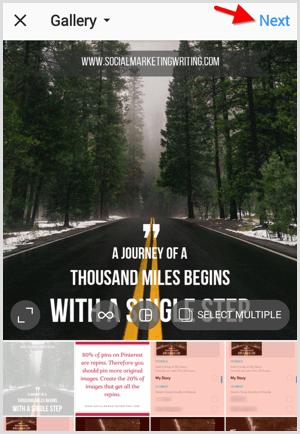
Then open the Instagram app, tap the + icon, and go to Gallery.
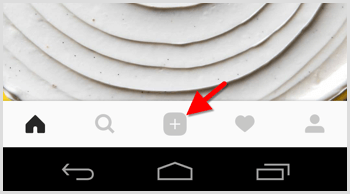
You’ll be able to see the images and videos you just downloaded here. Select the visual you want to share and tap Next at the top right.
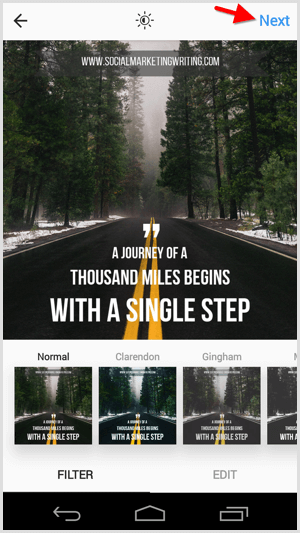
Choose a filter and edit the image if needed. Then tap Next again.
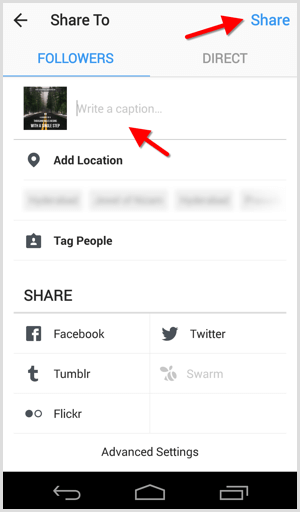
Now write a caption and share the post with your followers.
Conclusion
Creating unique images and videos is an absolute necessity for promoting your business on social media. These creations are not only required for marketing on visual-centric networks like Snapchat, Instagram, and Pinterest, but also on Facebook and Twitter because visuals drive the highest engagement.
You could always hire a designer or a video content creator to give you a hand, but that might cost you thousands of dollars. The four tools above will help you create professional-looking visuals in minutes without breaking the bank.

What do you think? Which tools do you use to create content for your Snapchat and Instagram accounts? Have you used any of the above tools? Please leave your comments below.
See more source :
4 Tools to Create Custom Instagram and Snapchat Visuals


0 comments:
Post a Comment